Month: February 2017


Bay windows and EWI – How does it Work?

11 02/17
bay windows

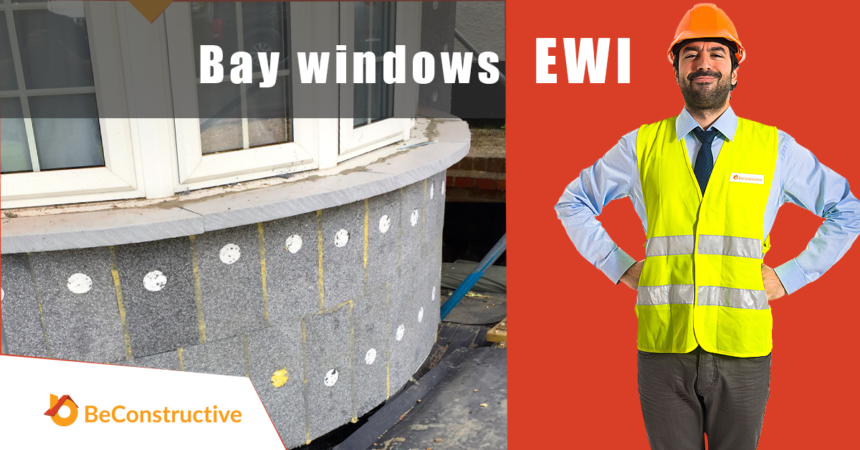
Bay windows and external wall insulation  – How does it Work?

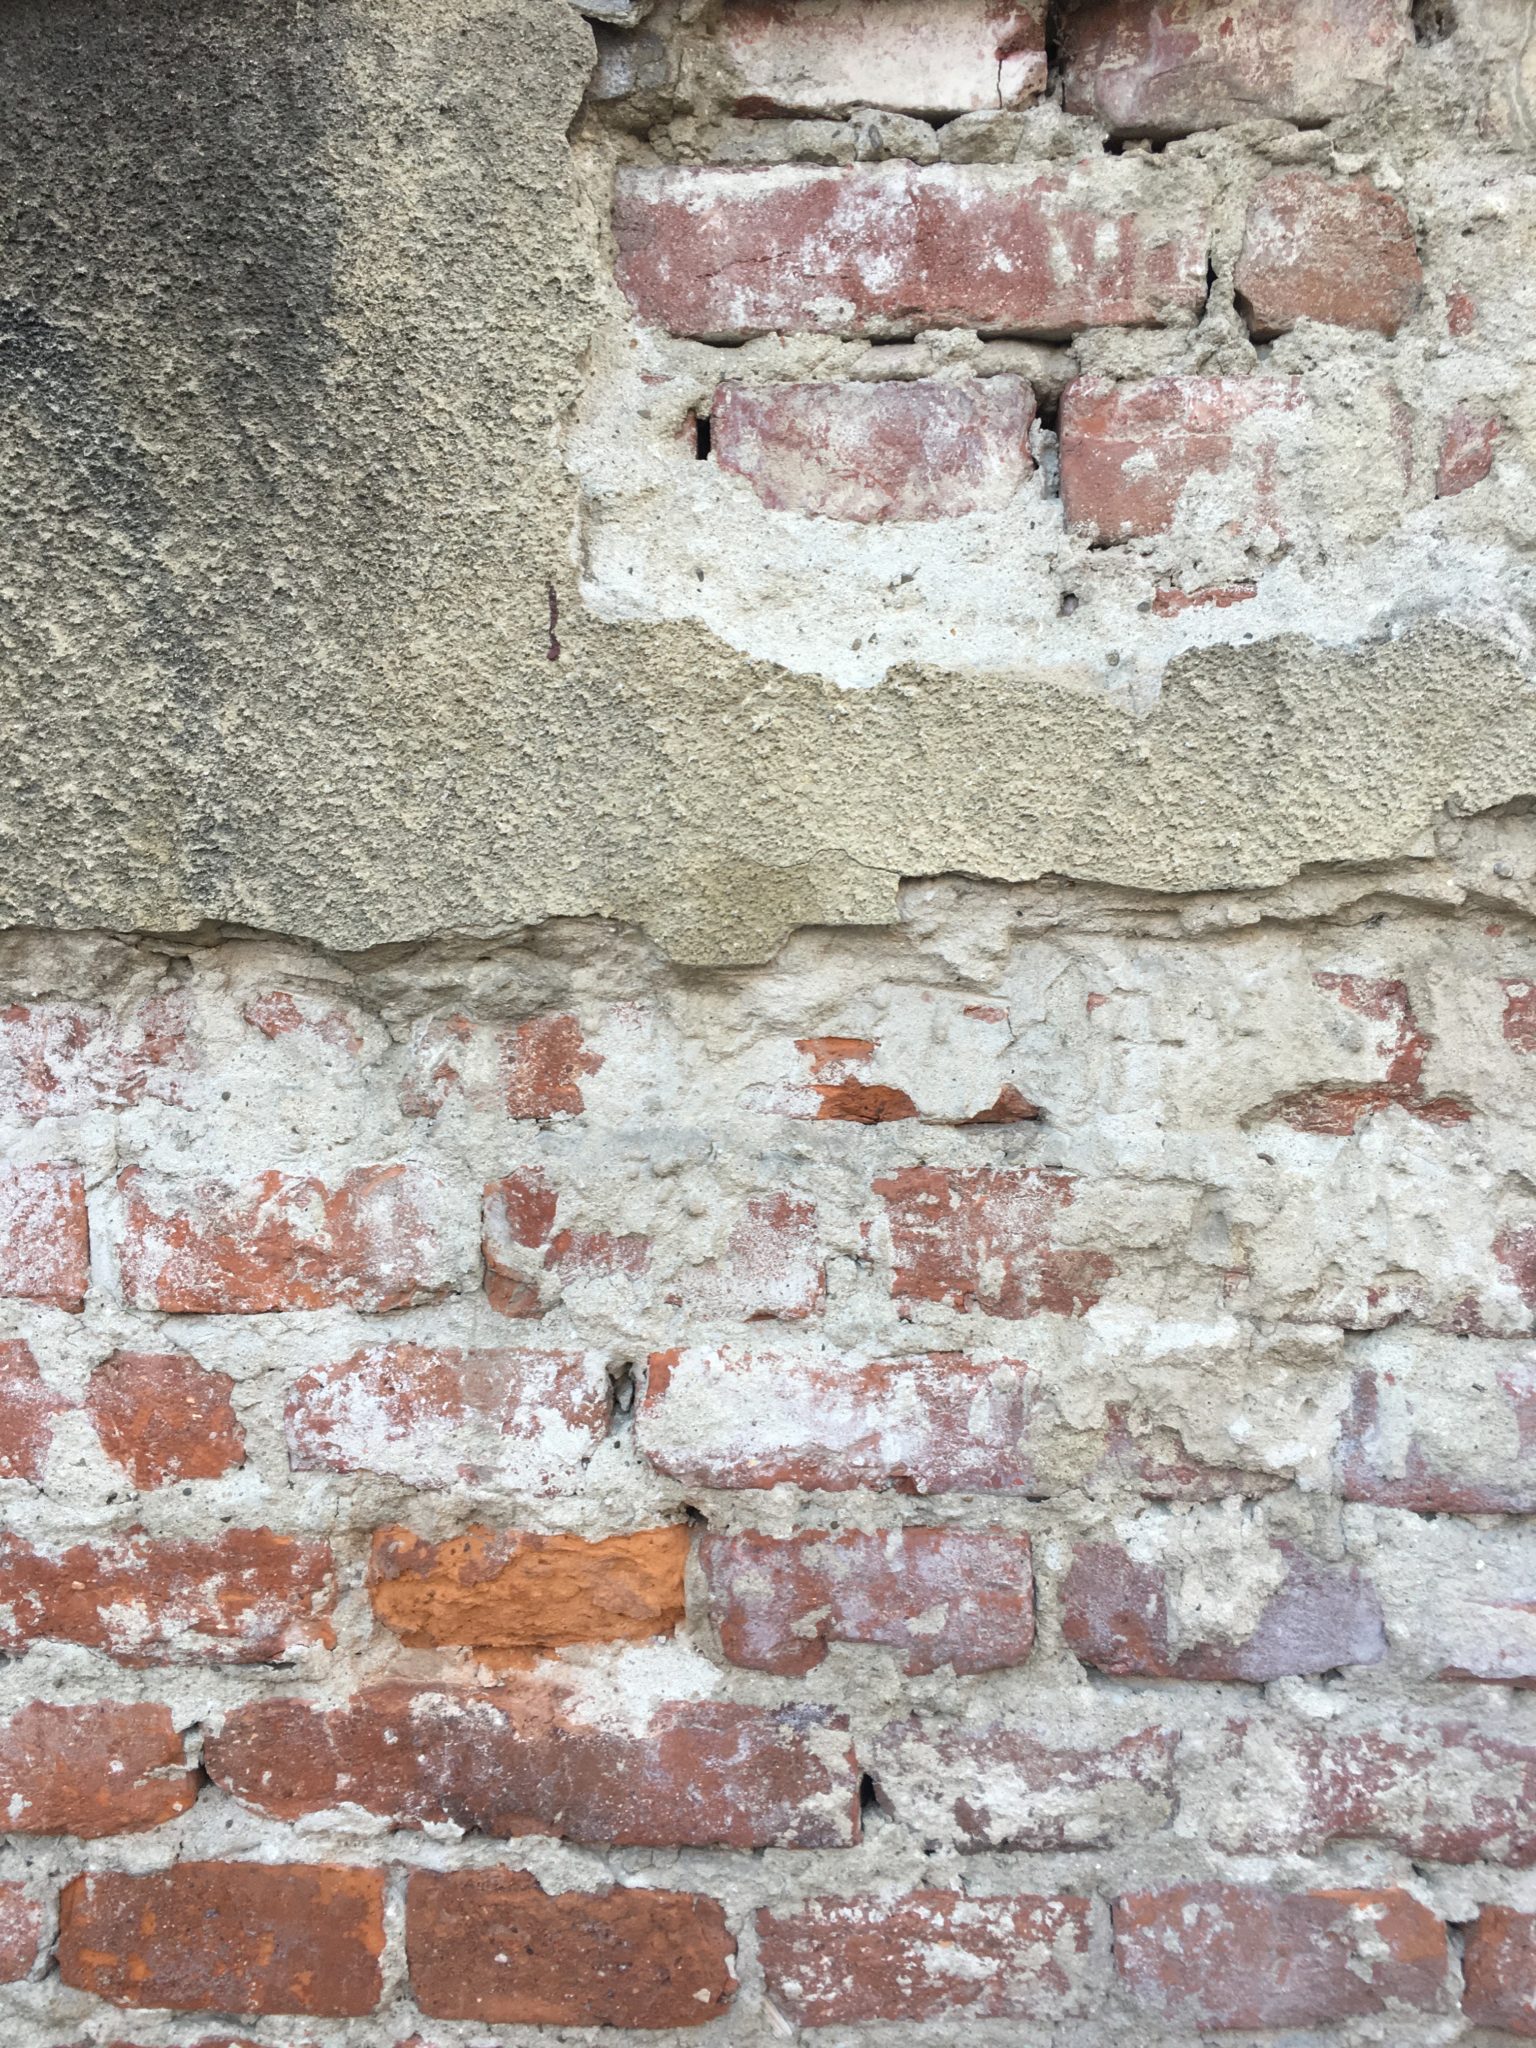
External insulation is often carried out on properties that were originally built in the 1900-1930s period. This is when the majority of solid brick properties are from. Many of these homes have bay windows with tiling around them, and in some cases have entire walls that have been tiled. We get asked about these areas and what we can do with them in terms of insulation, so in this blog we are going to take you through the options.

Can you just insulate up to the area and leave it untouched?

The simplest and cheapest option for the tiled areas is to not insulate them and leave them as they are. The tiled bays are often really small areas anyway, and the extra cost to carry out works on these is going to be more than a standard piece of rendered wall. But they are also often the most exposed and can sometime be a single brick thick, so they are usually a cold spot in need of work.

Can I remove the tiles completely and have a rendered wall?

The easiest option to insulate these areas is to remove the existing tiles and add a layer of insulation. This is then rendered to make the finish the same as the rest of the house. The cost of this is only a little more than the works on the main wall, at least per square meter.

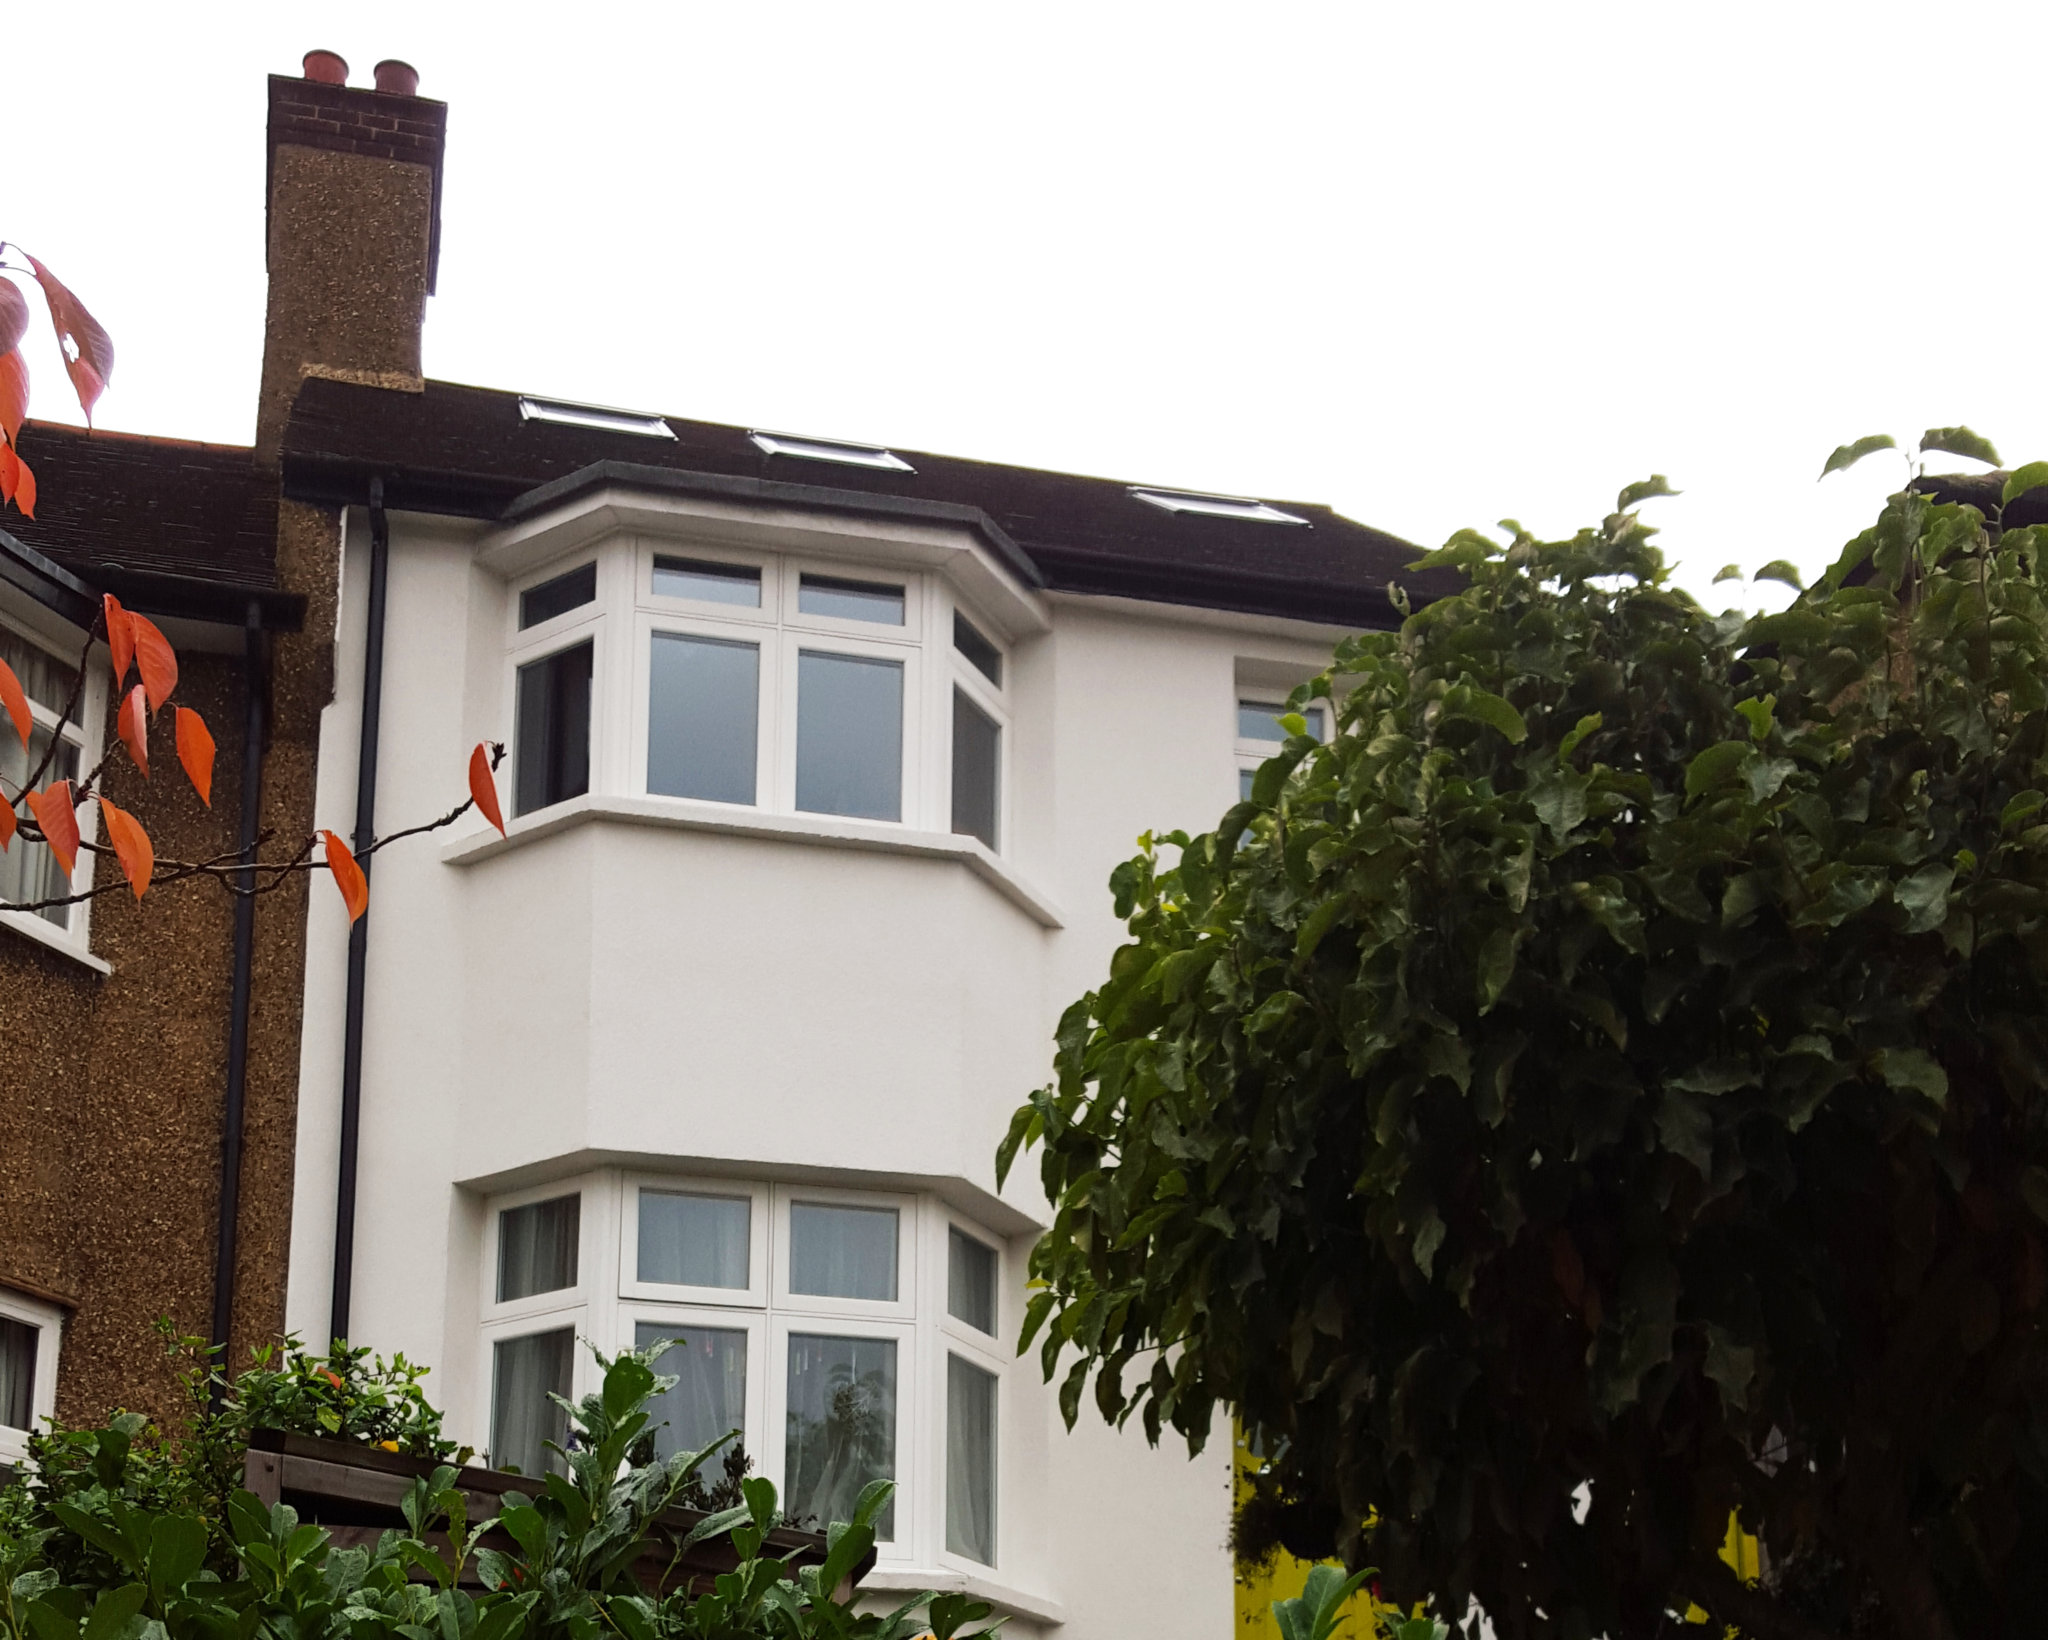
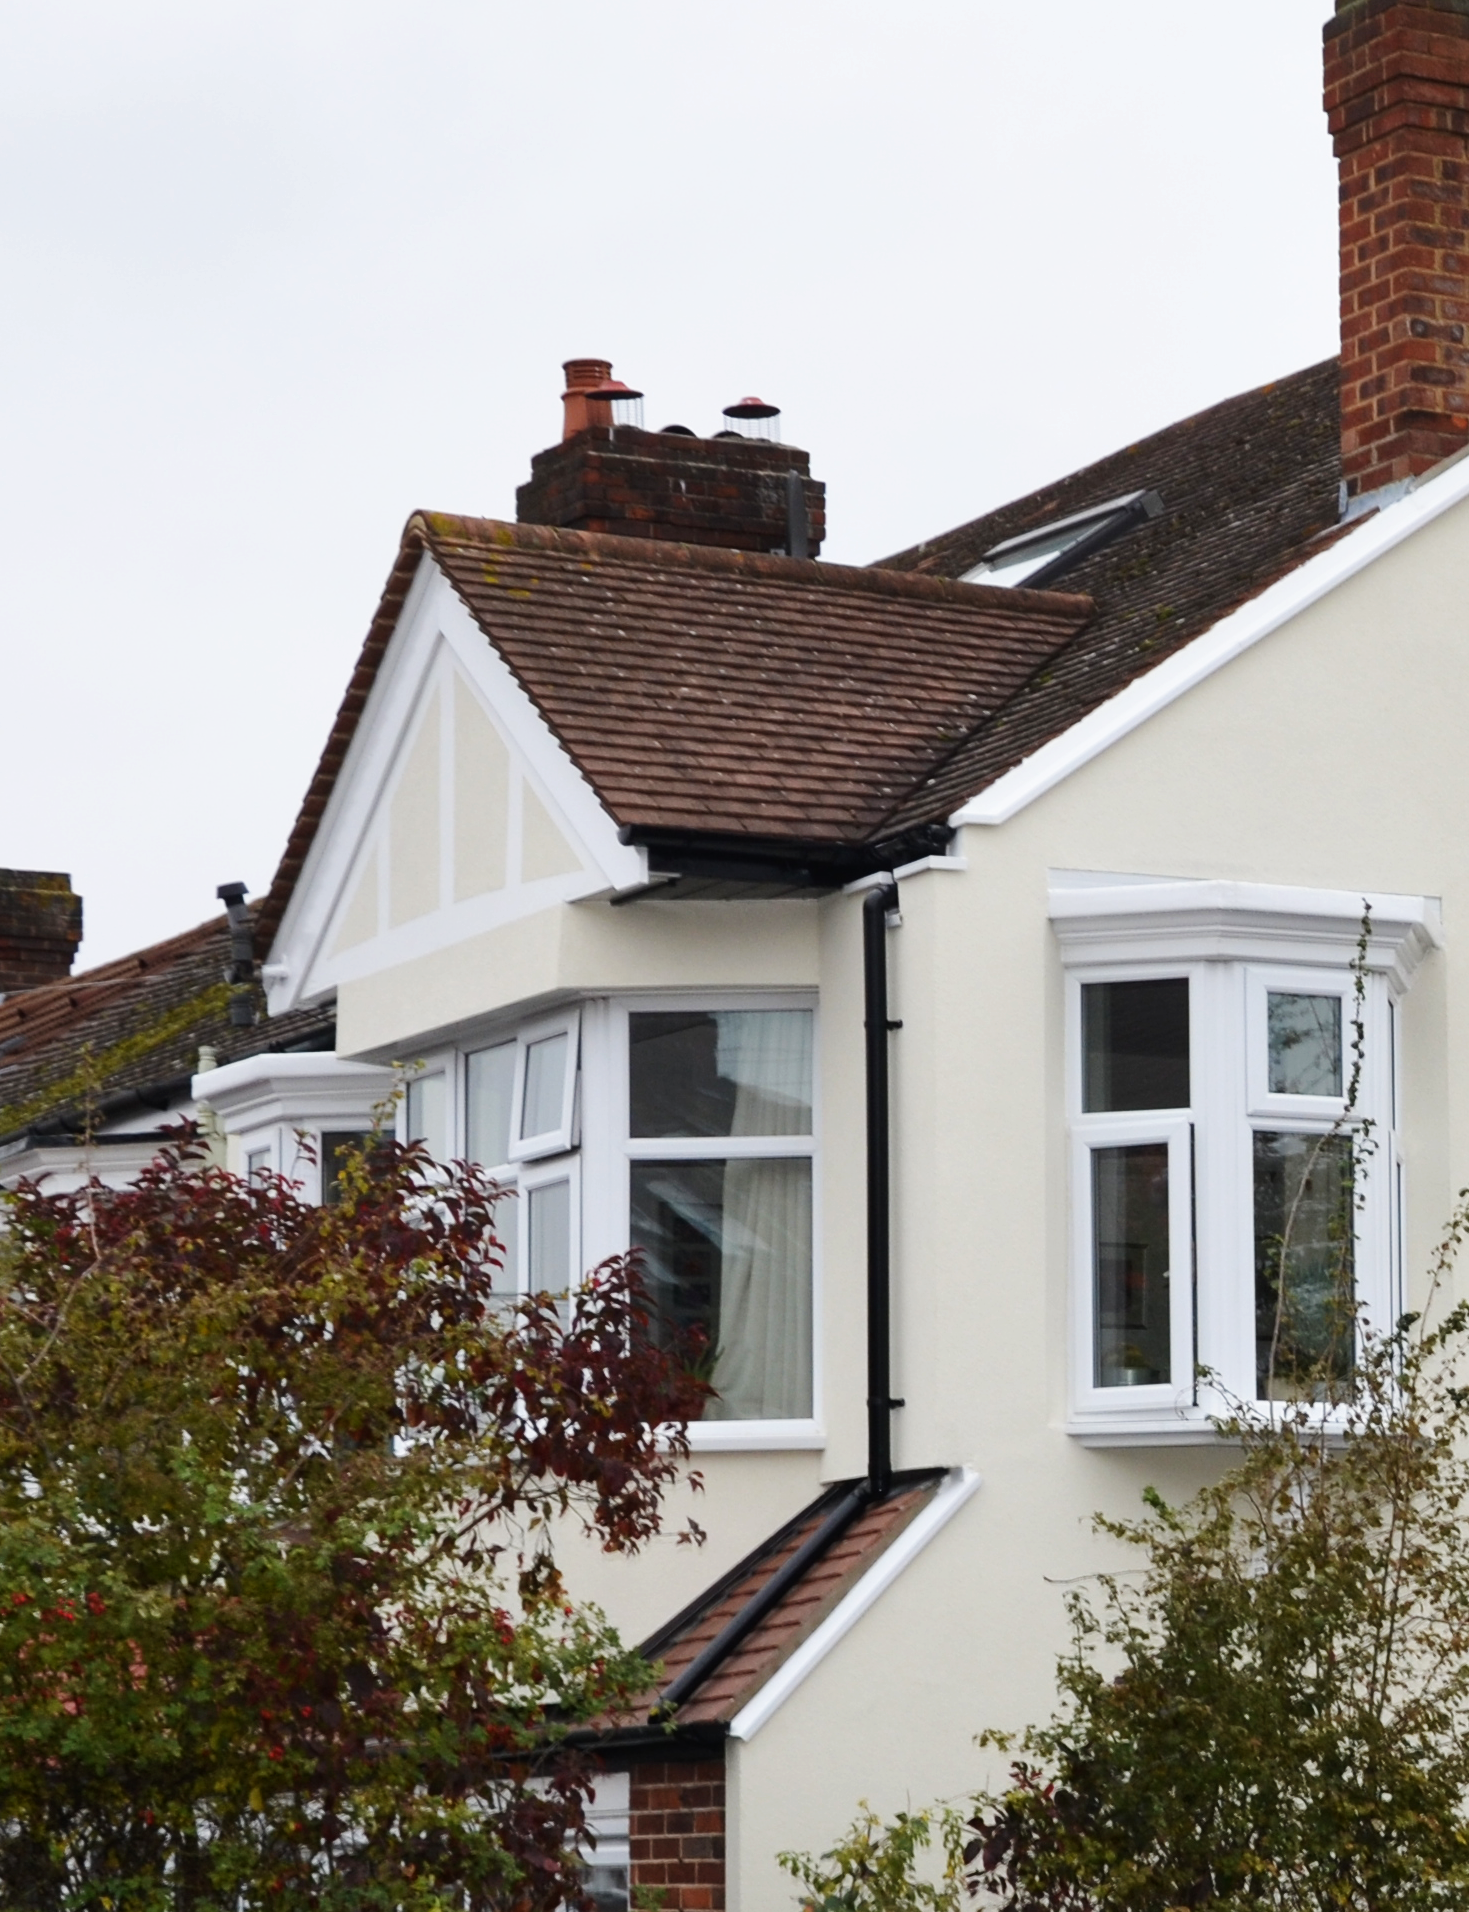
It can be a really good option, especially if other properties on the street have rendered bays – it won;t look out of place. The render won’t need as much cleaning as the tiles either, so there is a reduced maintenance cost.

Can I reuse the tiles already on the wall?

If you are going to take the tiles off the wall in order to insulate, many of the tiles are going to become damaged as part of the removal process. The tiles are often old and tired looking anyway, so we would usually look to add new tiles once the insulation is on, if a tiled finish is what you are after.

Can I insulate and retile the area?

Absolutely. This can produce some really great looking results, as can be seen on our recent Harrow installation. When you compare the new tiling to the neighbours, the stark difference in the colour after all those years of fading and exposure is amazing. The finish looks really good as well.

How do you retile and how does it look?

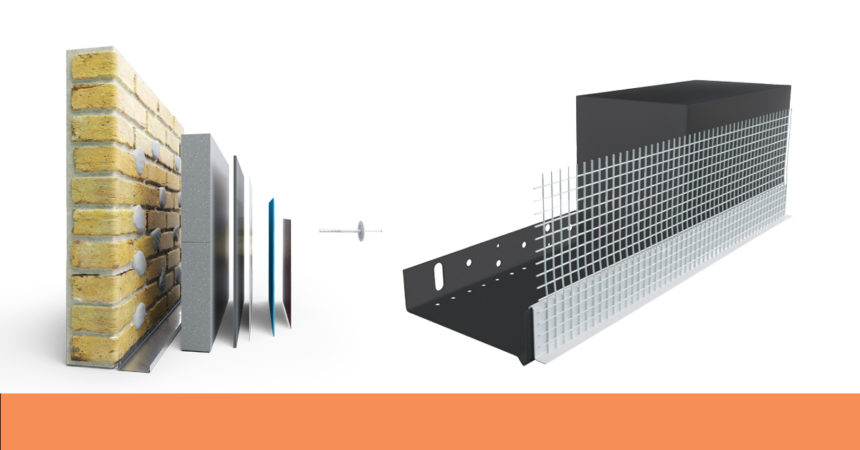
The retiling process is relatively straight forward, if a little time consuming. The tiles are stripped off and the timber batons underneath are usually removed – although it does depend on the type of surface you have underneath. The wall is then insulated, usually with rigid PIR board insulation, mechanically fixed to the wall. On top of this layer new timber batons are added to support the new tiles. Tiles ar then hung just like you would on a normal tiling job – the only difference is the new layer of insulation below.

This is obviously a lot more work and extra materials compared to an average render installation, so you should expect to pay more for the work. As you can see by some of the photos, it does leave a great looking finish though. Tiles get tired and faded over the years, often with build ups of biological growth as well as damage from wear and tear. Some tiles are 50 years old or more, and it really shows. Hanging new tiles will make a big impact on the appearance of the property, so we would be happy to give you this option when we come to quote.

As always we ask that you give us a call, and we will be happy to take a look at your property and provide a quote.


FINDING AN APPROVED OR RECOMMENDED INSTALLER

We have teamed up with EWI Pro to help provide homeowners with an approved and recommended installer network across the UK. EWI Pro are one of the UK’s leading render manufacturers and our experiences with them have always been extremely positive. They have excellent technical support and a vast array of quality products. Their list of approved and recommended installers are specialists, so by choosing one of them to complete your project, you can be assured that the work and the materials installed on your property will be to the highest standard.

If you are looking for an approved or recommended EWI Pro installer, please send an inquiry by filling in your details on the form provided!.


    Unsure of what materials you require?

    Use our EWI solid wall insulation materials calculator to calculate exactly what materials you will need for a particular job.

    EWI Pro Training Academy

    We are delighted to announce we have partnered with the EWI Pro Training Academy in Aylesbury to bring you a series of professional installer training courses.

    We have 6 unique courses to choose from, each targeting a different area of the External Wall Insulation installation process.The training courses are completed over the course of a half-day or full day, and installers will receive an EWI Pro certificate upon completion.

    Why this programme?

    The EWI Pro Training courses are designed with an all-round approach to learning. You will be given the chance to learn about installing EWI systems through a mixture of classroom and practical, hands-on training.

    This programme also allows you to learn from experienced EWI professionals with years of industry experience. This way, you will leave the course equipped with the most relevant skills.


      I would like to receive news and offers from EWI Store

      Pull out Testing – Ensuring your House is Suitable for Insulation

      07 02/17
      Pull out Testing

      What is Pull out Testing?

      Pull testing is a really simple procedure carried out on a rendered wall to check the integrity of the surface prior to adding insulation. When we come across a rendered wall with cracking or where there are signs the render is in a poor condition, we will perform the test to check whether the existing render needs removing prior to insulation.

      The test itself is really easy to perform. Our installer will adhere a small cube of insulation to the wall with the adhesive and leave this to dry for 48 hours. Typically we put the insulation over areas on the wall that are showing stress – along cracks for instance. After 48 hours the installer will return and pull on the insulation in an effort to remove it from the wall. There are two possible outcomes – either the insulation will come away leaving the render behind on the wall, or the render will come away with the insulation leaving the brickwork exposed.

      Of course, if the render is being pulled off the wall by the adhesive, then we will need to strip that area of render and level it prior to insulating. If the render stays put, then it is fine to insulate over.

      What tool  to use to do Pull out Testing?

      Hydrajaws Model 2000 Medium Duty Fixing Testers enable engineers to confirm the holding power of anchors in most construction materials, either for the purpose of establishing safe working loads or to validate the correct installation of existing fixings. The tensile load of up to 25kN is applied to the fixing mechanically and hydraulics are used to register the load through an accurate analog gauge, making the tester very reliable.

      When do you need to perform a Pull Test?

      The pull test will be used on any rendered wall which is showing even the slightest sign of failure. Ideally it should be done along all cracks and areas where the render has blown. You don’t need to do this procedure on brick or painted brick walls, nor on rendered walls in excellent condition.

      Do I need to get the Whole Wall Stripped if a Pull out Test Fails?

      The answer to this is no – although it will depend on how many failures occur. If the majority of the pull tests fail, then it is probably advisable to get the whole wall stripped of the existing render.

      If only one or two spots fail, then it is usually possible to remove the poorer areas of render, add a levelling mortar to get the surface as even as possible, and then add the insulation over the whole area. This is something our expert installers will be able to judge on site, but you should be aware that significant stripping of render will carry an additional cost.


      Can I strip my render anyway?

      Yes. Some customers want to strip the existing render anyway. Usually this is because the old render is quite thick, and space might be at a premium on a certain elevation – such as on a driveway or an alley between the houses. The important thing to note is that often removing render will necessitate a levelling mortar because of the condition of the brickwork below, so be aware that the additional costs can stack up if you choose to strip the whole way. We can talk you through the costs and benefits in more detail on our visit.

      How much does it cost to strip render?

      This will depend a little on the condition of the render, its thickness and type. A typical price might be around £25 per square meter, which would cover the labour involved to remove it and the cost of disposal of the old render, which can be surprisingly high. Thick old render can take up a whole skip or more in some cases!  This of course does not include any remedial work to the wall underneath, which is often in a bad state and requires levelling.

      This is why we try to avoid stripping render wherever possible, and in 95% of our works, little to no render stripping is required. But don’t worry, we can go through this on our site visit prior to works beginning, and ensure you are fully aware of the implications for your walls.

      FINDING AN APPROVED OR RECOMMENDED INSTALLER

      We have teamed up with EWI Pro to help provide homeowners with an approved and recommended installer network across the UK. EWI Pro are one of the UK’s leading render manufacturers and our experiences with them have always been extremely positive. They have excellent technical support and a vast array of quality products. Their list of approved and recommended installers are specialists, so by choosing one of them to complete your project, you can be assured that the work and the materials installed on your property will be to the highest standard.

      If you are looking for an approved or recommended EWI Pro installer, please send an inquiry by filling in your details on the form provided!.


        Unsure of what materials you require?

        Use our EWI solid wall insulation materials calculator to calculate exactly what materials you will need for a particular job.

        EWI Pro Training Academy

        We are delighted to announce we have partnered with the EWI Pro Training Academy in Aylesbury to bring you a series of professional installer training courses.

        We have 6 unique courses to choose from, each targeting a different area of the External Wall Insulation installation process.The training courses are completed over the course of a half-day or full day, and installers will receive an EWI Pro certificate upon completion.

        Why this programme?

        The EWI Pro Training courses are designed with an all-round approach to learning. You will be given the chance to learn about installing EWI systems through a mixture of classroom and practical, hands-on training.

        This programme also allows you to learn from experienced EWI professionals with years of industry experience. This way, you will leave the course equipped with the most relevant skills.


          I would like to receive news and offers from EWI Store

          External wall insulation Starter Track

          03 02/17
          starter track ewi

          What is Starter Track?

          Starter tack is a tray fixed to the base of the wall, above the damp proof course, and is used to create a flat and straight starting point for the external insulation boards to sit in. The tracks are fixed directly to the wall with screws, and have a lip at the front that beading can attach to in some cases. It is an essential part of most EWI systems and it is easy to spot a job that hans;t used starter track.

          What Options are there for Starter Track?

          The starter track can come in metal or in plastic. These are the two main choices. We usually recommend plastic, as it avoids any unnecessary cold bridges at the base of the insulation, and looks more in keeping with the rest of the wall.

          Is Starter Track Unsightly?


          Because of the shape and material used to make the starter track, we do often get asked whether the track is unsightly. Although a common query, it is easy to allay these fears. Once the works are complete, the only way to spot the starter track is to lay down and look underneath the base of the insulation! The track will appear as a seamless piece of metal or plastic, and therefore is not going to cause an eyesore.

          If you really hate the look of it, we can do some additional works to bring the insulation down to the ground level…


          Can you Insulate Down to the Ground?

          You can indeed insulate down to the ground. What does this mean? Well, normally the insulation stops just short of the damp proof course. This leaves a gap between the starter track and the ground. This can range from 3 inches up to a few feet depending on the height of the DPC.

          Where this is not desirable, and extra layer of insulation, made from a denser material called XPS, is added below the DPC and tanking is used to effectively create a new DPC at ground level. This is great  because you get a perfect render finish all the way down to the ground, and the starter track gets buried between the insulation layers.

          FINDING AN APPROVED OR RECOMMENDED INSTALLER

          We have teamed up with EWI Pro to help provide homeowners with an approved and recommended installer network across the UK. EWI Pro are one of the UK’s leading render manufacturers and our experiences with them have always been extremely positive. They have excellent technical support and a vast array of quality products. Their list of approved and recommended installers are specialists, so by choosing one of them to complete your project, you can be assured that the work and the materials installed on your property will be to the highest standard.

          If you are looking for an approved or recommended EWI Pro installer, please send an inquiry by filling in your details on the form provided!.


            Unsure of what materials you require?

            Use our EWI solid wall insulation materials calculator to calculate exactly what materials you will need for a particular job.

            EWI Pro Training Academy

            We are delighted to announce we have partnered with the EWI Pro Training Academy in Aylesbury to bring you a series of professional installer training courses.

            We have 6 unique courses to choose from, each targeting a different area of the External Wall Insulation installation process.The training courses are completed over the course of a half-day or full day, and installers will receive an EWI Pro certificate upon completion.

            Why this programme?

            The EWI Pro Training courses are designed with an all-round approach to learning. You will be given the chance to learn about installing EWI systems through a mixture of classroom and practical, hands-on training.

            This programme also allows you to learn from experienced EWI professionals with years of industry experience. This way, you will leave the course equipped with the most relevant skills.


              I would like to receive news and offers from EWI Store

              EWI Verge Trim

              02 02/17
              external wall insulation verg trim

              External Wall Insulation and Verge Trims

              EWI  Verge Trims are suitable for most situations requiring the capping of external wall insulation systems and rendering systems. 

              A verge trim is a thin strip of plastic or metal that sits at the top of the wall where the insulation meets the roofline. There are many different types and styles of trim, but the purpose is always the same – to create a water tight seal that prevents any moisture penetration the stystem.

              Some roofs have a wide enough soffit to allow the insulation to sit underneath. In this case, good quality beading will be sufficient to create a seal with the soffit board, and water ingress should never be a problem. However, not all roofs have a wide enough soffit to accommodate the insulation, and in these cases, a verge trim is usually required.

              solid wall insulation varge trim

              Extending the Roofline – The Ideal Solution

              This is particularly useful on gable walls where the tiles stop abruptly at the edge of the gable wall. In this case, timber batons can be installed and a new row of tiles added to create an extended roofline on the property. The insulation can then fit under this perfectly, creating a perfect water proof solution. The cost of this procedure is around £1,000-£1,500 however, so some customers want a more affordable option. We always stress to customers that this option is the best, and that it is worth spending the extra money to do the job right.

              Verge Trim and Creating a Water Proof Seal

              Where there is a facia board, it is usually possible to tuck the verge trim behind it, or up under the roofline. The join is then sealed with silicon sealant to help prevent water ingress. This is usually sufficient where there is guttering to help the water drain away, but in more exposed places the silicon can fail quickly and allow moisture behind the system. This is bad news, so it is important you discuss with your installer the best method for finishing your verges and that you are confident in the integrity of the design of the system. At Be Constructive, we try to minimise the use of silicon – it is a really useful tool, but unfortunately it will not last the lifetime of the system and need replacing every few years in the most vulnerable places. This means that we cannot guarantee silicon on our insulation systems, and try to avoid using it wherever possible. Sometimes it is the only way to do the job within the budget available however, and in these cases it will be up to the customer what option you want to take and what cost is associated with that work.

              Sometimes lead can be used to help create a waterproof seal. Lead is an expensive material, but it is really useful because it can bend into any shape to fit the verge in question. The only question is where the lead needs to finish along the roof in order to ensure water can’t get down the back of it.

              What does the verge trim look like, well you can see some examples on our site. There are a range of colours and styles available, although most customers will opt for the white trim as it is the most in keeping with many properties in the UK.

              external wall insulation veerge trim insulation

              FINDING AN APPROVED OR RECOMMENDED INSTALLER

              We have teamed up with EWI Pro to help provide homeowners with an approved and recommended installer network across the UK. EWI Pro are one of the UK’s leading render manufacturers and our experiences with them have always been extremely positive. They have excellent technical support and a vast array of quality products. Their list of approved and recommended installers are specialists, so by choosing one of them to complete your project, you can be assured that the work and the materials installed on your property will be to the highest standard.

              If you are looking for an approved or recommended EWI Pro installer, please send an inquiry by filling in your details on the form provided!.


                Unsure of what materials you require?

                Use our EWI solid wall insulation materials calculator to calculate exactly what materials you will need for a particular job.

                EWI Pro Training Academy

                We are delighted to announce we have partnered with the EWI Pro Training Academy in Aylesbury to bring you a series of professional installer training courses.

                We have 6 unique courses to choose from, each targeting a different area of the External Wall Insulation installation process.The training courses are completed over the course of a half-day or full day, and installers will receive an EWI Pro certificate upon completion.

                Why this programme?

                The EWI Pro Training courses are designed with an all-round approach to learning. You will be given the chance to learn about installing EWI systems through a mixture of classroom and practical, hands-on training.

                This programme also allows you to learn from experienced EWI professionals with years of industry experience. This way, you will leave the course equipped with the most relevant skills.


                  I would like to receive news and offers from EWI Store